60 Degree Stars Quilting Tutorial
Jenny Doan
60 Degree Stars Quilting Tutorial
- 1 roll x 2.5" Strips (Jelly Rolls) - Print
- 4¾ yards x Background Fabric (Incl. Inner Border
- 1½ yards x Outer Border Fabric
- ¾ yard x Quilt Fabric for Binding
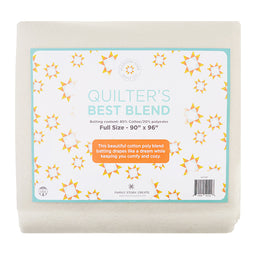
- 5¼ yards x Quilt Backing Fabric
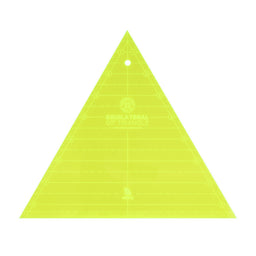
- 1 x Missouri Star 8" Equilateral 60 Degree Triangle Ruler
- 1 bottle x Spray Starch (recommended)
Featured products Get the Supplies Featured in this Tutorial


Finish your masterpiece and let us give it the finishing touch it deserves.
Subscribe to MSQC on YouTube
Hundreds of FREE tutorials and a new one from Jenny launches every Friday.
video transcript
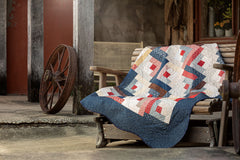
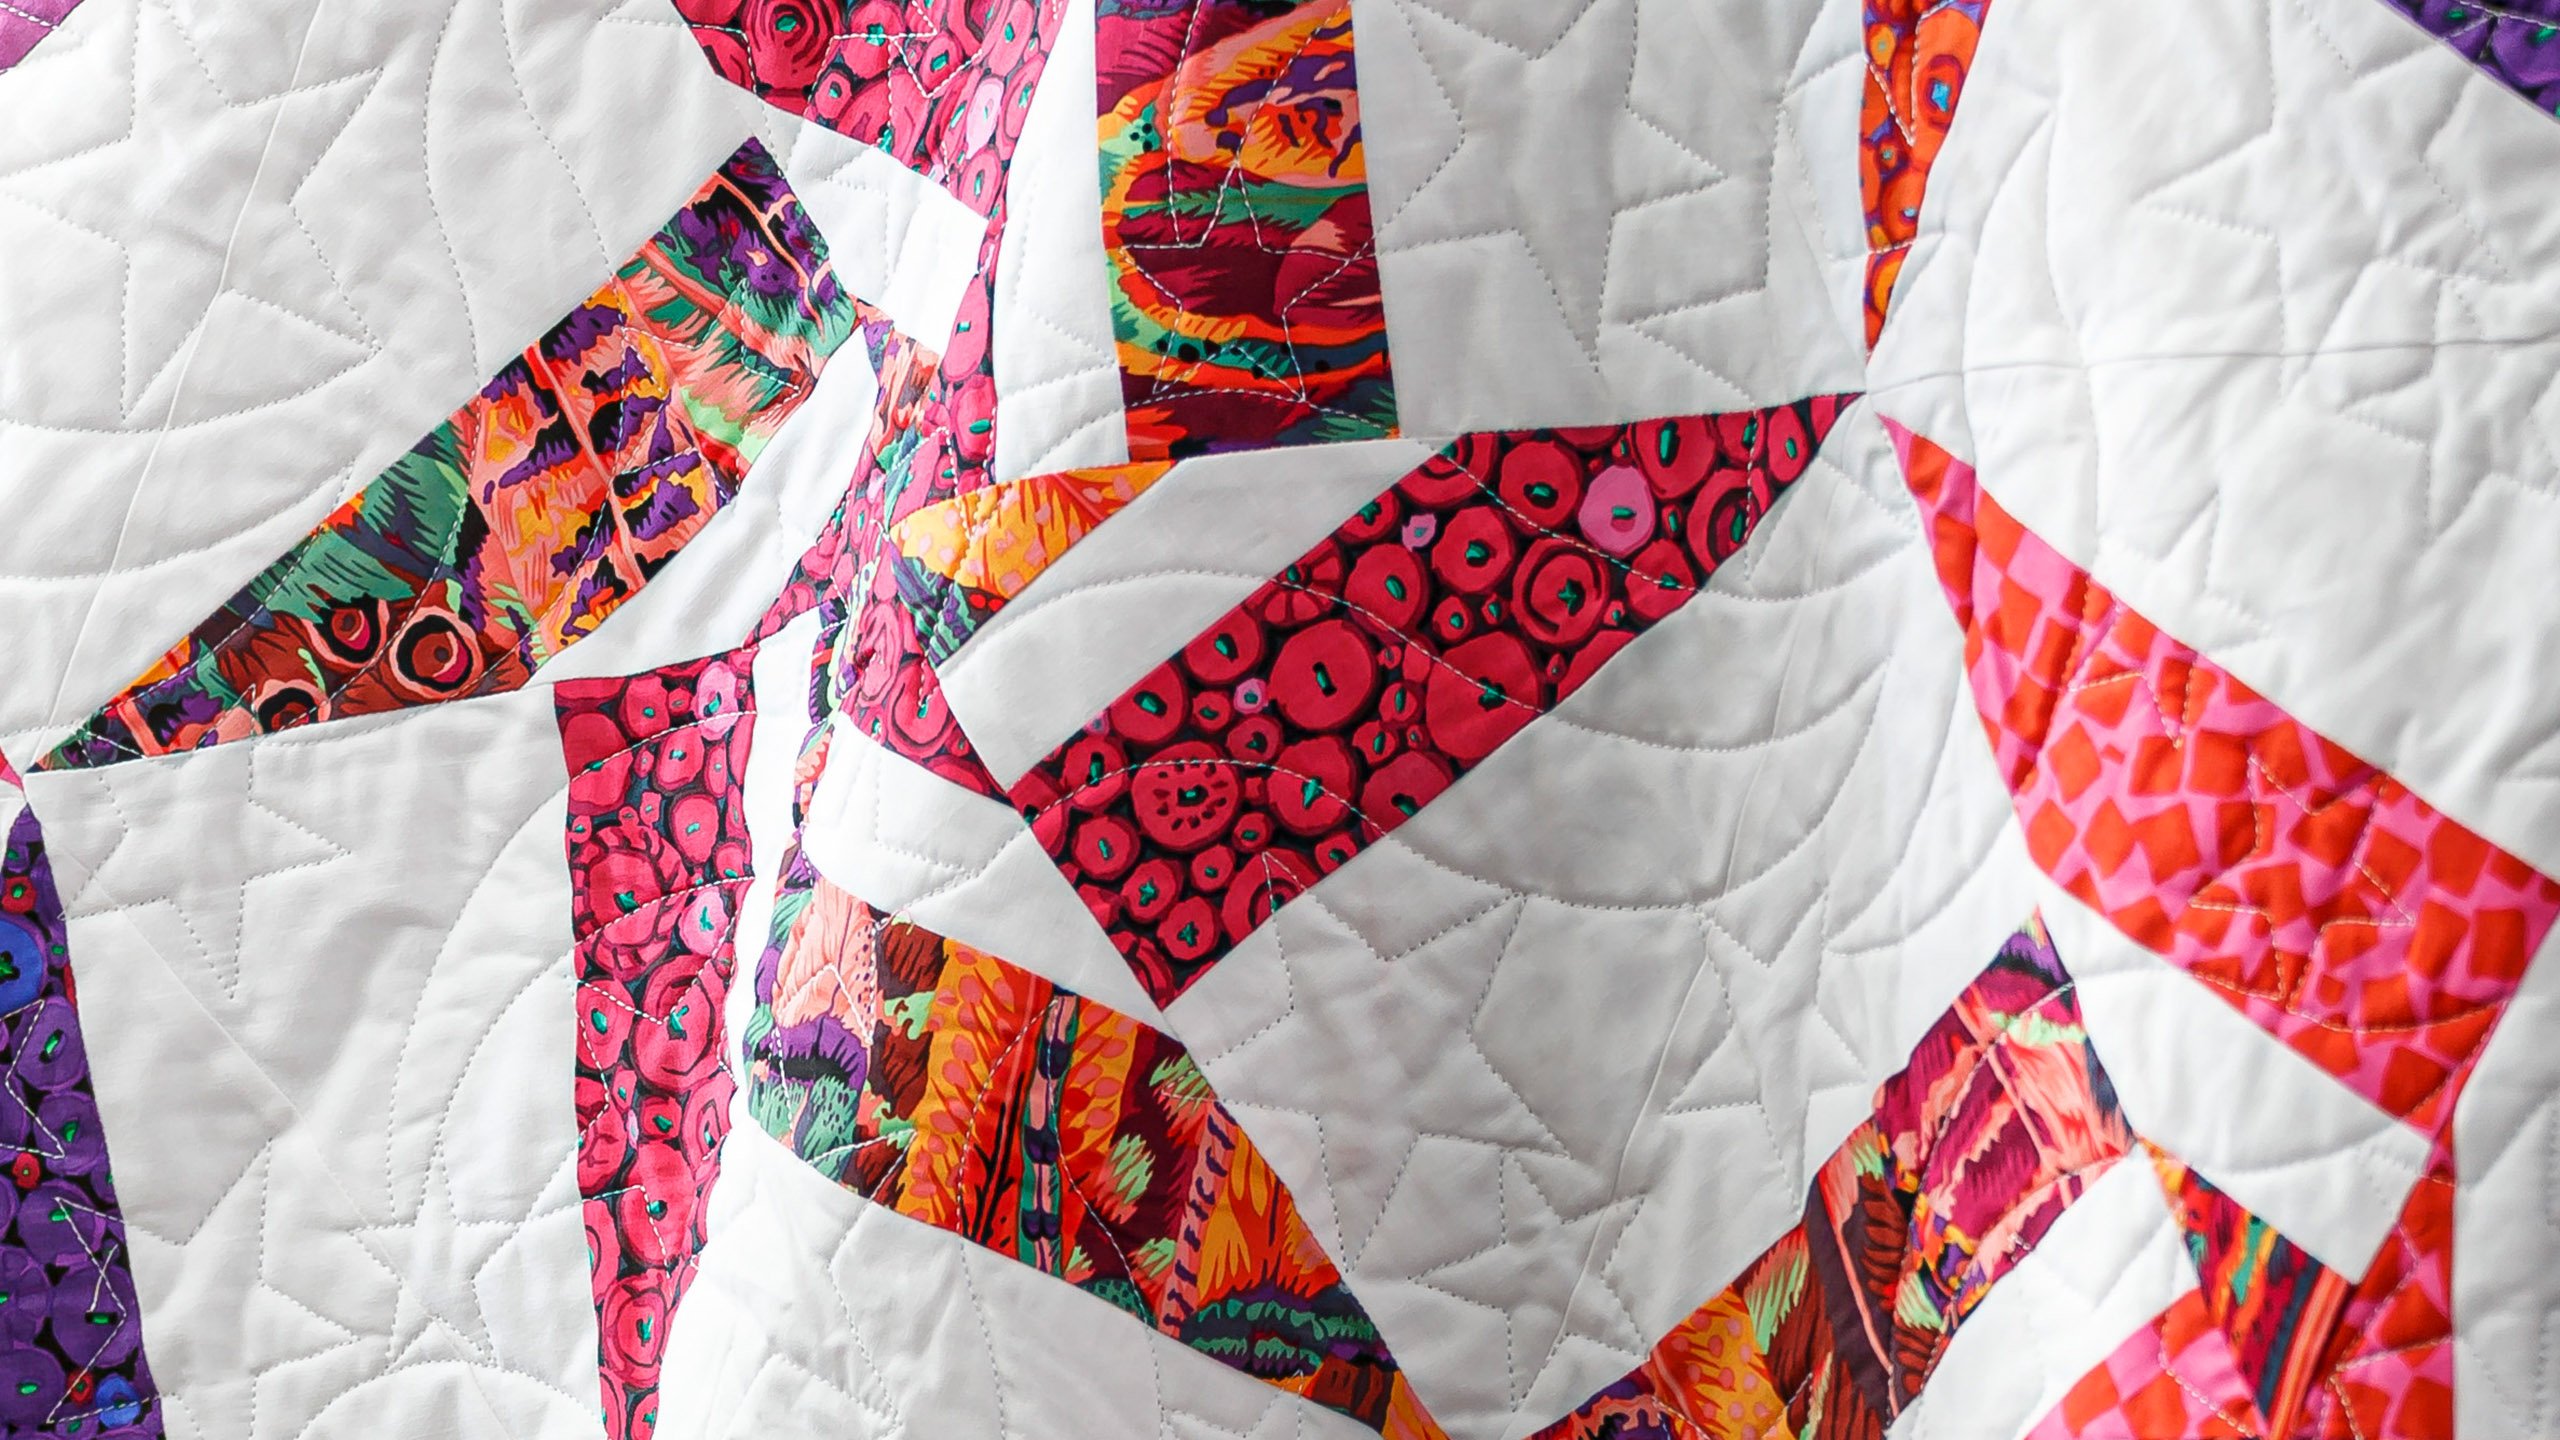
Hi everybody, it’s Jenny from the MSQC. And we’ve got a great project for you today. Take a look at this quilt behind me. Isn’t this fun? These are our 60° triangle stars. Whenever we come out with a template we try to do lots of different things with it. And this is so much fun to play with. And if you have a 60° ruler it will work perfect for this. So let me tell you what you need to make this quilt. You’re going to need one roll of 2 ½ inch strips. And we have used Kaffe Fassett Collective February 2021 Hot. And you’re going to need some background fabric, 4 ¾ yards. You’re going to need 1 ½ yards for this 5 ½ inch outer border. And on your backing you’re going to need 5 ¼ yards for the vertical seams or 2 ¾ yards of a 108 backing. So this quilt is all made using a strip set. And let me show you how that’s done. So we take our 2 ½ inch strips and you’re going to take two of them and I’ve got two right here just like this. And we are going to set them just a little bit apart because in between these two strips, we are going to put a 1 ½ inch background strip. So here’s that right here. You’re going to sew these all together just like this. And then you’re going to add a 5 ½ inch strip to the side. And so it’s going to look like this. So here’s our large strip set, 5 ½, 2 ½, 1 ½, 2 ½. Just like that. That makes your strip set. I have one already sewn together because I really wanted to get into the technique of showing you how to make this quilt. So we’re going to set this aside over here.
And this is my strip set that I sewed together to show you how to make this quilt. Alright so first thing we’re going to do is we’re going to cut this into four ten inch squares. So what I’m going to do is I am going to fold this in half like this and cut two at a time. You can do it however you like. Make sure they’re lined up pretty good. I’ll put that down here. And then I’m just going to come on my line and I’m going to come over ten inches. So I know my ruler is five, I”m just going to flip that. That’s going to give me two cuts right there. And these don’t have to be exact because we’re cutting, we’re going to cut them again. And I am actually going to go ahead and open this one up and just get my two cuts out of this. Because I don’t want that little piece leftover, I want to include that. Alright so we’ve got five and five. And you can see I’m really not worrying too much about these so that they’re exact. Now with three of these we can make our star. So we just want you to lay this one aside because later I have a cool back piecing technique to show you where we used these extra blocks on the back. It looks so cool. So hang in for that.
Alright so the first thing we’re going to do right here is we’re going to take our piece right here and we are going to turn it so the white is always on the right, white on the right, that’s your mantra on this one. We’re going to take our triangle, we’re going to lay it on here. We’re going to line up the center line with this seam line right here, right on the 5 ½. We’re going to line up that center line. And what we’re going to do is we’re going to cut one out of here like this and don’t cut all the way, just go ahead and cut down and come down the other side. Cut a little bit past but not all the way. Then we’re going to take this piece out right here and I’m going to fold it in half and I’m going to take it over to the sewing machine and sew this together. So we’re going to go ahead and sew right down the seam on this. And then what I’m going to do is I’m going to go ahead and take apart this little edge right here. It should come apart fairly easily. And I’m going to press it to the dark side like that. And I’m going to set this triangle aside and then I’m going to make another triangle out of this one. And this, always the white fabric, the large white piece to the right. And then we’re just going to cut this again. And so this is very little waste. But the fact that we’re doing it turned this way makes a whole different idea.
Alright so we’re going to go ahead and do that with all of these. And so again I’m just going to lay this on the line, come up here, oop. Sometimes it’s hard to go down the other side and you can very easily use a rotating mat on that. Don’t ever get yourself into a place cutting that makes it dangerous for you. Because quilting should not be a dangerous sport. Alright and then I’m just going to take these apart right here. And really there’s, you know, just a couple of stitches so it comes apart really easily. Press to the dark side and then we’ll bring this over here and we will cut our next one. Again I’m lining it up on that line and trimming up one side, down the other. Alright and one more here. Now this bottom doesn’t look, so the bottom of this isn’t very straight so I’m going to trim that as well. I’m going to pull this out of here. And then I’m just going to turn this so that it’s easier for me to cut, keep my middle line lined up and then I’m just going to trim this edge off nice and straight right here. Alright last two, take these two fold them in half, sew them together and then that makes our other triangles. So very little waste on this quilt. And you know I love those kind of quilts where we can really use a lot of it. Alrighty. Again, last time here. Lay this on the bottom, line up the middle, hold it down, trim up one side and down the other. Alright.
Now let me show you how I put this together. Now here is an interesting little fact about this quilt. I have a design wall in my studio and it’s only so wide and so long. So I actually put this quilt together sideways. So I did it in long rows sideways and then when you turn it those long rows become vertical. And so just so you know you can put it together sideways or vertical but this is one long row of stars. And when we put these stars together you’re going to need all six of these. And what I’m doing is I’m watching for opposites. I kept my opposites together. So you can see this one, you have the large blue here and the small blue here. And the large purple, polka dot, spotted thing here and here. So what we’re going to do is we’re going to watch this little center piece because those are the pieces we want to line up. So the next piece is going to go here like this and opposites. And so this has this spot one, I’m looking for the spot. This is going to go in here. We’re going to sew those three together and that’s going to make the beginning of our big hexagon star. And so just sew down the side. It’s all straight sewing. Keep them lined up. And when you’re making this you’re just going to want to sew these halves together, all the halves. Because when you go to put them together in rows this half, this row, the other half will come into the secondary row. So we’re going to lay this over here. And we’re going to sew this one down. Line up your edges. These triangles fit right into the points, right together. And so even on your, where your seam is it should match up exactly. Alright so here’s the top half of our star. And we’ll press that, make it nice and flat just like this. And then we’ll sew the bottom half of our star. So of course we’re going to want to match it up. So we put it here. Make sure again your opposite colors and here and here. And that makes our swirling star. Isn’t that beautiful? So let me sew this bottom half together and then I’ll show you how we lay out the quilt. And then open it up and we’ll add this guy over here. It always makes a straight top so if you have anything that doesn’t look straight before you sew it check it. Alright here we go. Now when you’re sewing these together these triangles should fit in here really nice and so it’s easy to sew together. None of these actually, if they line up it’s kind of an accidental lining up. But they don’t really, there’s nothing really to match them to. And so they just line up just like that. It’s very easy. Alright.
So here’s our two pieces. Now when we go to set this quilt together what we’re going to do is we’re going to take this one right here and this one is going to sew right along to the edge of that one. Do you see how this seam just matches up perfectly right here. Right there. And this one is going to be part of this top row up here. So when you sew your quilt together you’re going to start and end each row with a background 60° triangle. Let’s look at the quilt here. So right here see where we’ve started this row right here. We’ve put in a triangle but then we’ve cut it off straight. And so this is the beginning of this row and the end of this row. You’re going to need eight of those. And if you take a piece of fabric nine inches and you just open it up like this and you’re going to put your triangle on it like this. And we’re going to go ahead and cut a triangle here like this. And then just take this one out but flip your ruler over like that. Make sure it stays lined up on the bottom. And then you’ll just be able to keep cutting them and flipping it back and forth and back and forth. And so you’re going to need one at the beginning and end of each row. And how we attached those is we’re just going to go right here to the edge of this one. Let’s see if I can get these apart. Right here. So this is our star. We’re pretending this is the beginning of our row. And we’re just going to attach this on here like this. So we’re going to lay it over. We’re going to line it up exactly. The points meet exactly. There’s no quarter of an inch hang over and we’re going to sew that on. And you’ll do this at the beginning and end of all your rows. Alright so let’s press this open. And then what we’re going to do on this is we’re going to take our ruler, and you’ll do this when you get all your rows together, you’ll do a nice, straight trim like this. And so let me make sure that this seam is lying. I want the seam to lay all the same way. See how it’s kind of rumpley. I usually iron from the front then I flip it over to make sure it’s going all one direction so it lays nice and flat. What we’re looking for is a flat quilt. So then what you’re going to do is you’re going to take this and you’re going to line it up and you’re going to make a straight cut so now you have a straight edge for the beginning of your row. And I kind of line mine up a little bit with this and just maybe hang it into there a little bit. You’re just going to trim that off and you’ll do that all the way down the side of your quilt because your rows will all be sewn together. This one will have another one here. And then you’ll be able to have a nice straight edge on yours where then you can add an inch and a half strip out here for your first border and a 5 ½ inch piece out here for your second border. And it just makes such a great quilt. Alright so you get your border on there and it’s so much fun.
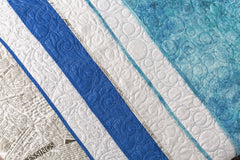
But wait there’s more. Remember this block right here. This one, what we’re going to do with this one is I”m going to iron this nice and flat and get my seams going the same direction. And then what we’re going to do on this is I’m going to cut this into 2 ½ inch strips. So take all your leftover squares and go ahead and cut them into 2 ½ inch strips. And this actually could be any width you want. You have plenty to do that with because this is going to be a surprise on the back of your quilt. Alright so these are all going to be different. You’re going to trim these all up. We’re going to have all different colored ones. We’re going to mix them all up. And we’re going to flip them and sew them together like this. Alright. But of course yours are going to be all mixed up, all the different pieces. And so now let me show you the back of the quilt.
So take a look at the back of this quilt. It’s nearly as much fun as the front. First of all I love this Kaffe backing. It’s a 108. We used 2 ¾ yards of that. But we have this nice long piece and we put it in the middle but you’ll notice it’s offset just a little bit. If you ever want to enlarge the backing for your quilt by putting a strip in, know that because it gets rolled separately on three different rollers you’re never exactly sure where it’s going to end up. So I always stick mine right in the middle and don’t care if it’s offset one way or the other. This one is a little offset, not enough to bother me. But look, this would even make a cool table runner. It would make a cool bench pillow. These pieces, don’t let this last square go to waste. And so just go ahead and cut them up and we just put them right in the middle of the back. I think it looks super fun. So we hope you enjoyed this tutorial on the 60° Stars and the Fancy Back from the MSQC.
We hope you enjoyed watching this video. If you’re not already part of the Missouri Star quilt family you can hit the subscribe button below so you won’t miss a thing. And if you click that bell it will notify you every time a new tutorial comes out. See you next Friday.
& Progress on Social